

Alerts and notifications
SignalSitter sends incident and recovery events to a callback endpoint. An endpoint is an HTTPS URL your own system runs, one person reached through WhooshBang, or everyone in your organization reached through WhooshBang. Set up the endpoint once, then choose which monitors use it.
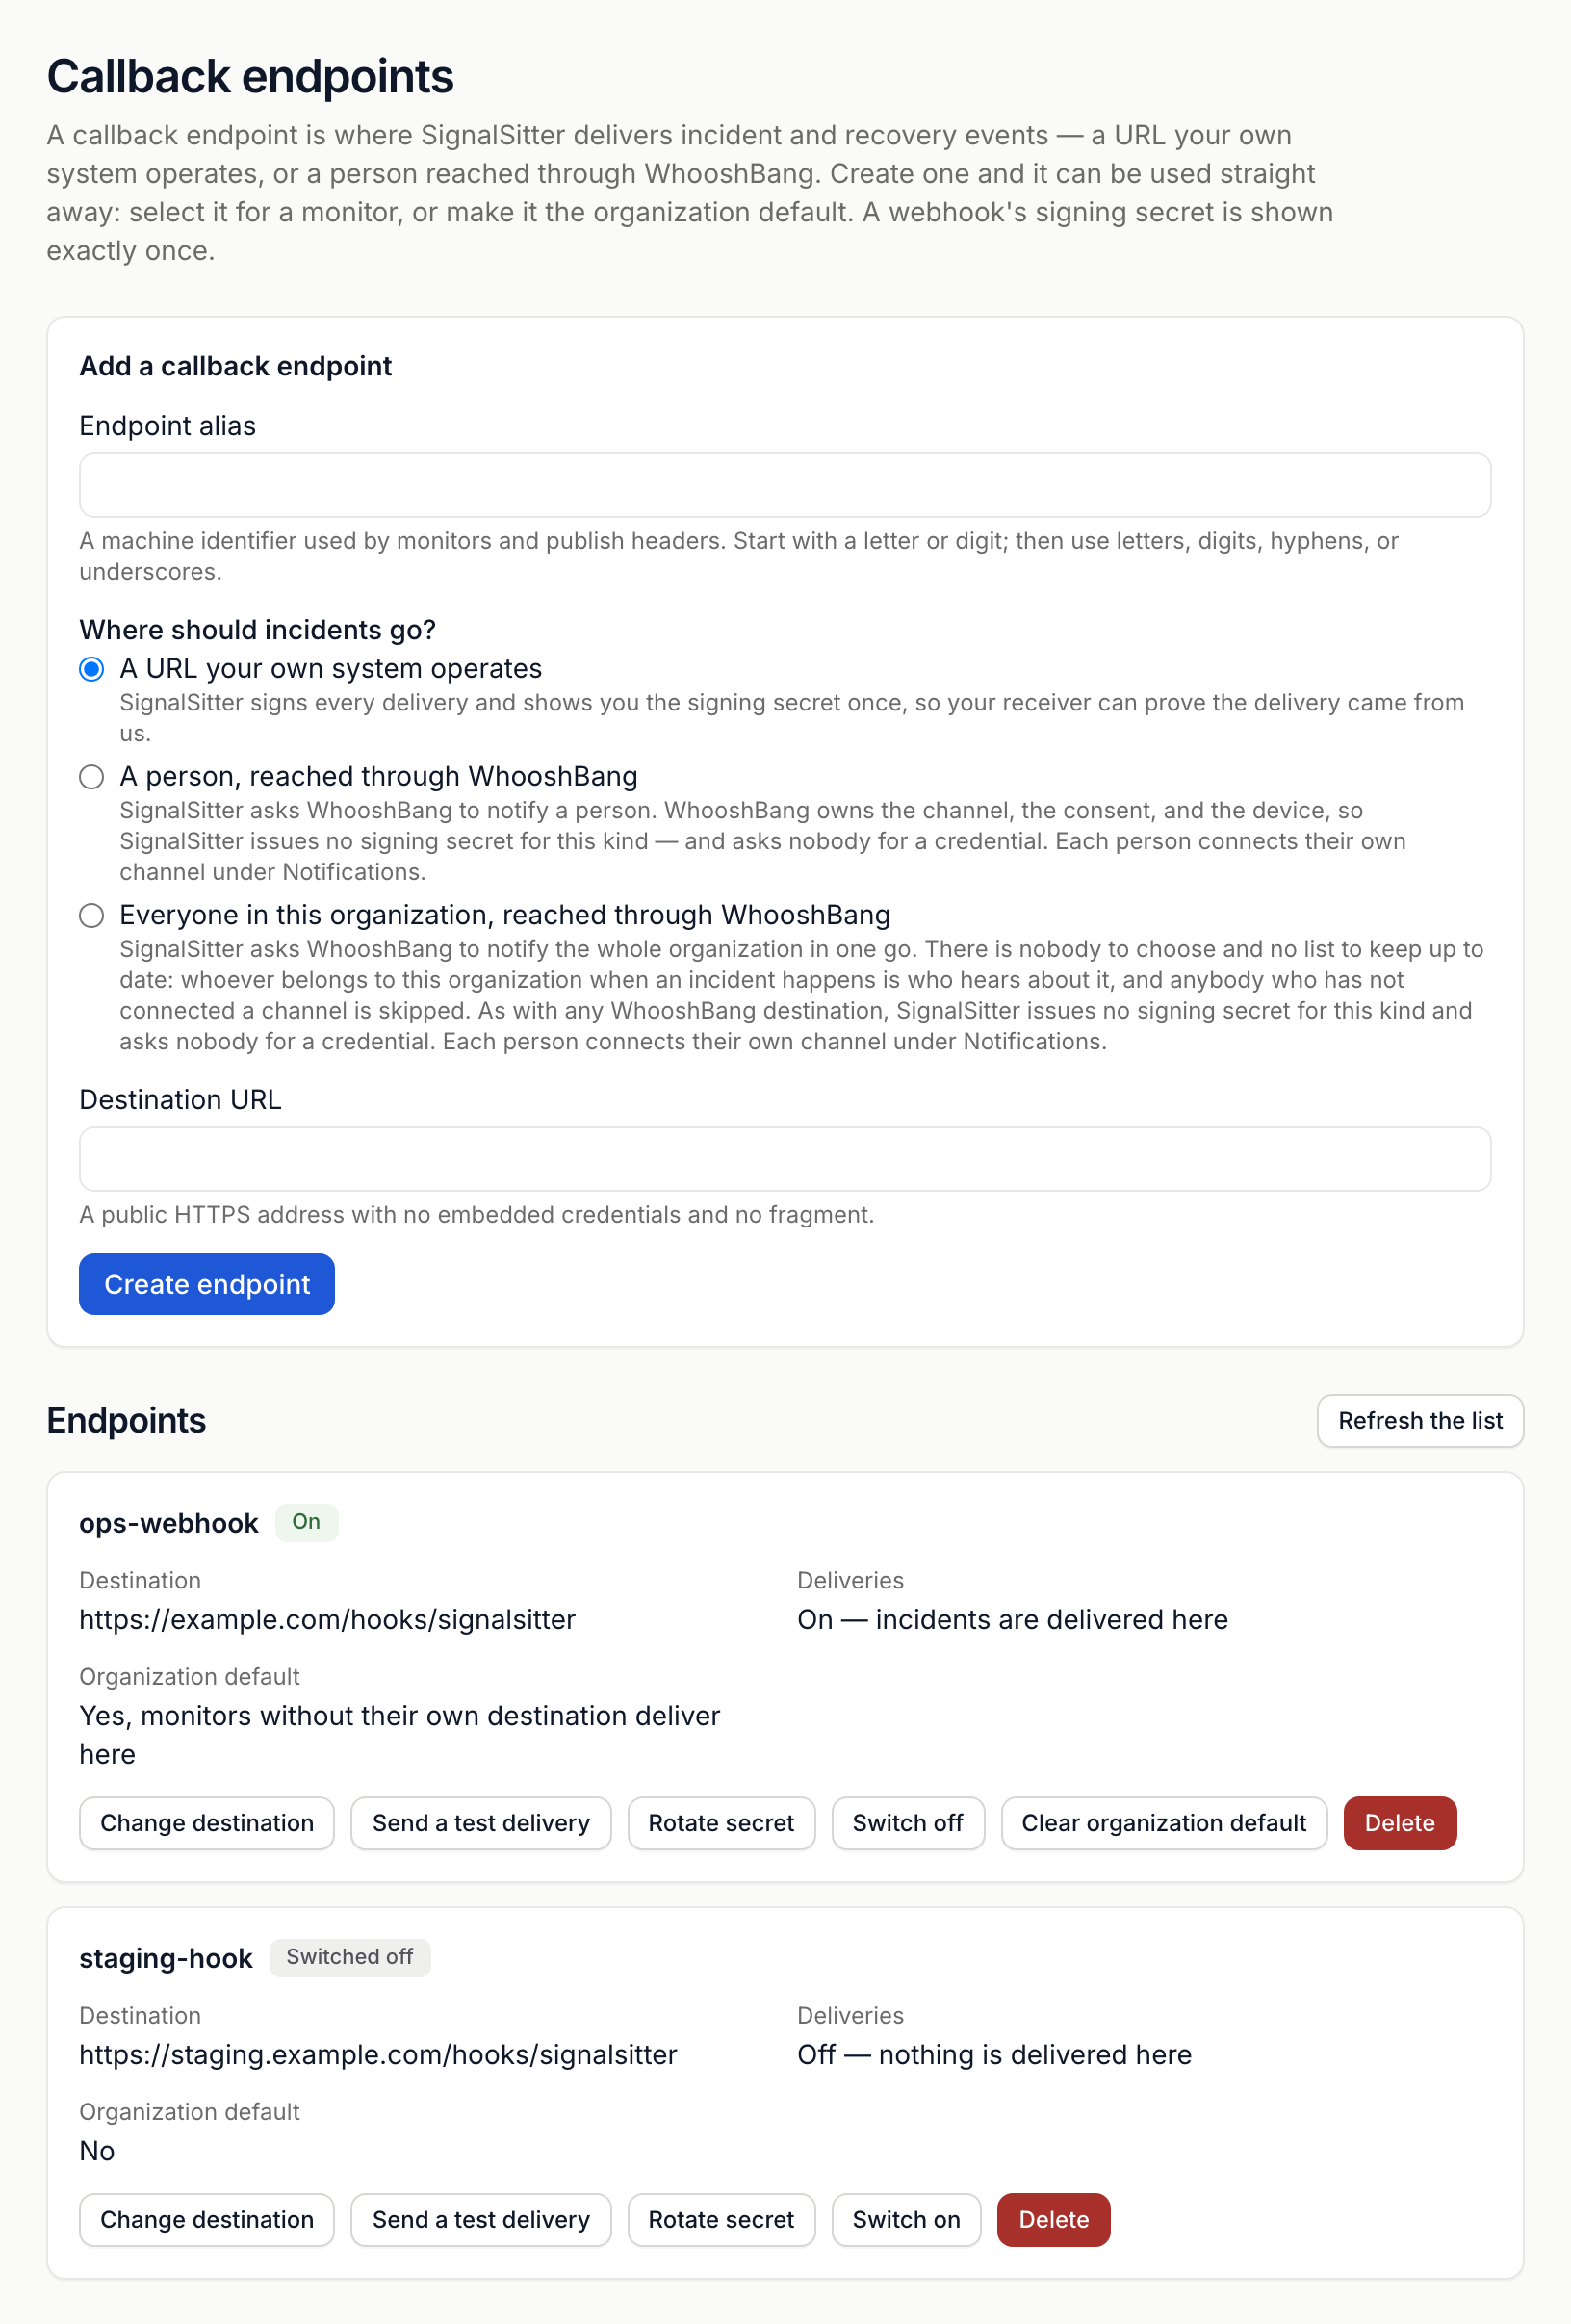
Add a callback endpoint
Section titled “Add a callback endpoint”- Go to Settings > Callback endpoints.
- Enter an Endpoint alias: 1 to 64 letters, digits, hyphens or underscores, starting with a letter or digit. Monitors and publish headers use this name.
- Under Where should incidents go?, choose A URL your own system operates.
- Enter the Destination URL: a public HTTPS address with no username,
password or
#fragment. - Press Create endpoint.
- Press Copy the signing secret and store it with your receiver. It’s shown once. Then press I have stored it, hide this secret.
Your receiver uses the secret to check that each delivery came from SignalSitter. See the REST API guide for the delivery format.
Send alerts to people through WhooshBang
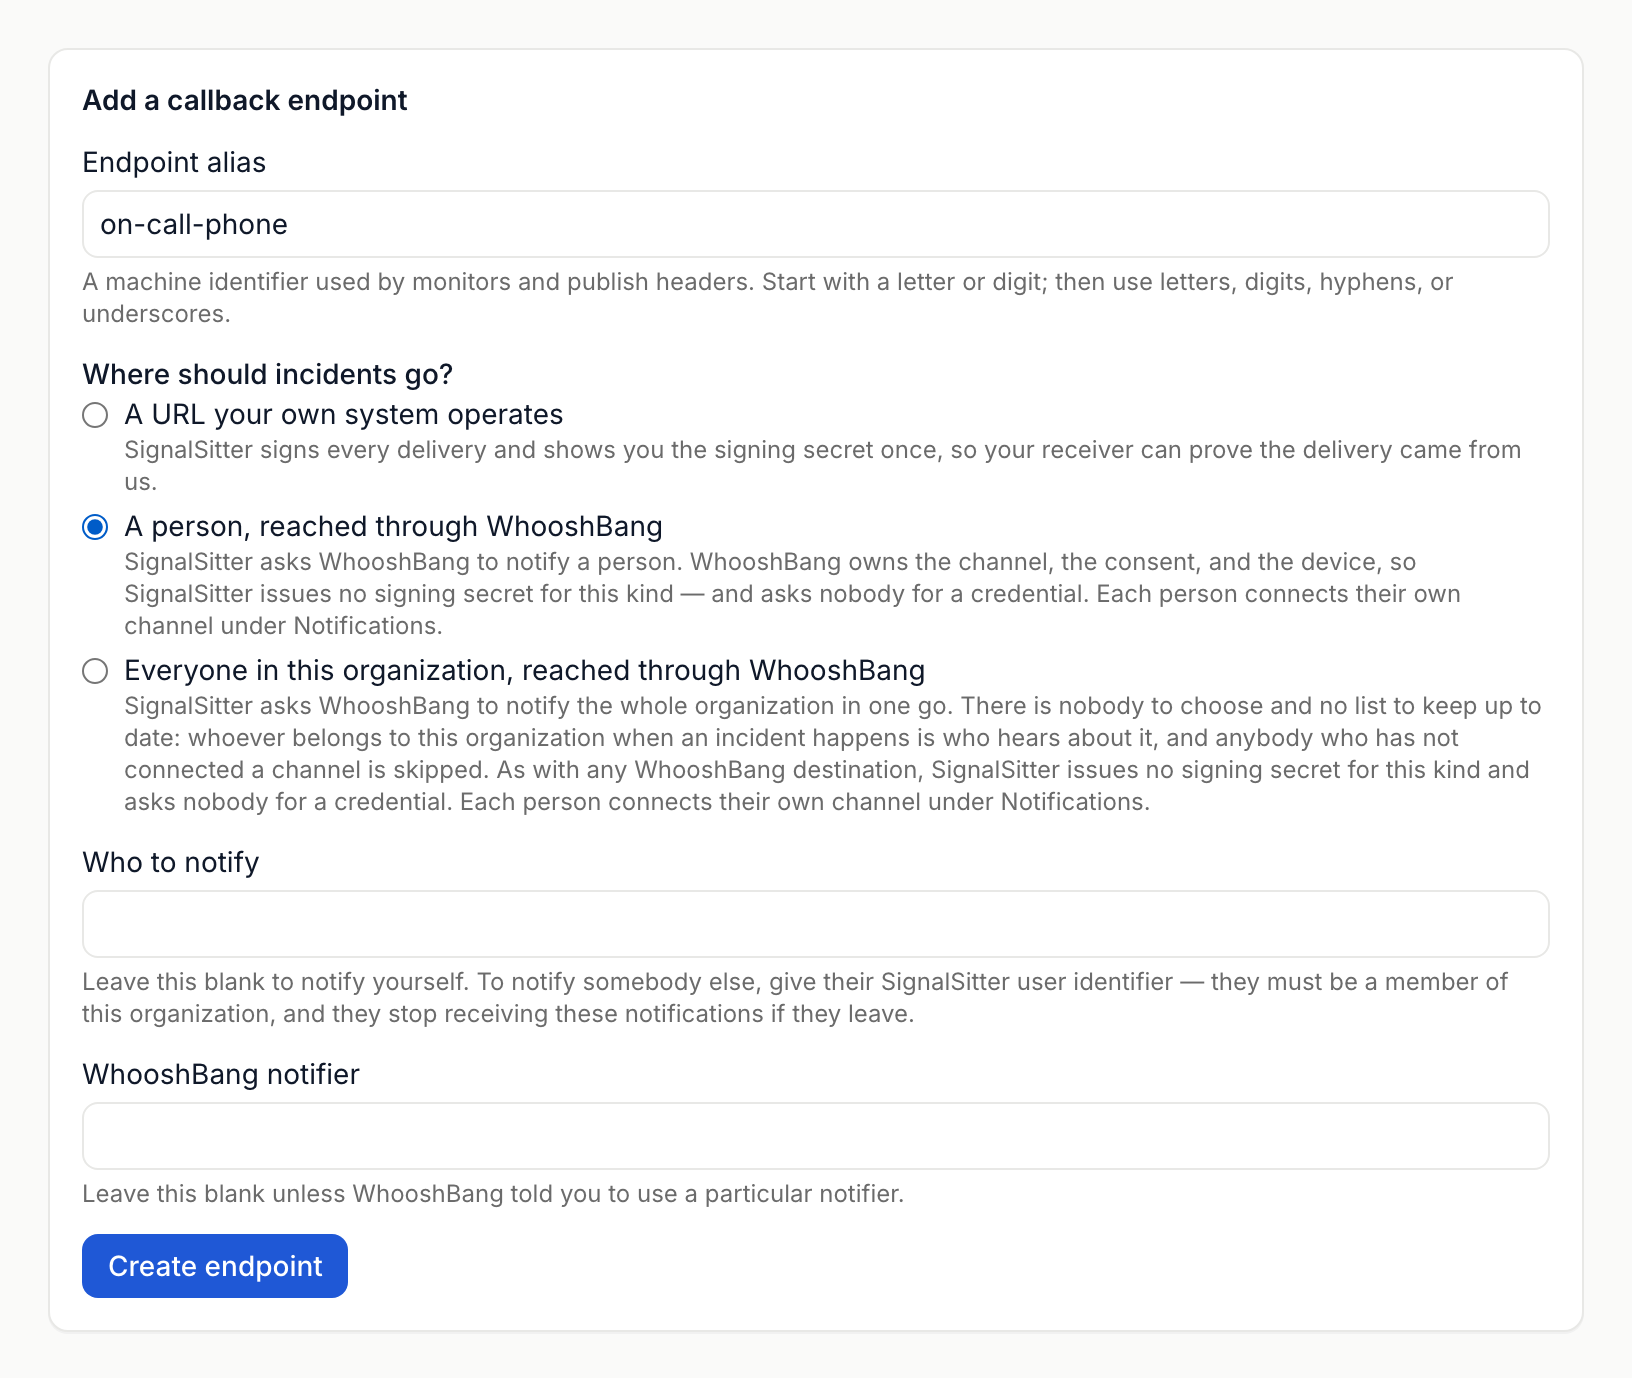
Section titled “Send alerts to people through WhooshBang”WhooshBang delivers alerts to a person’s own messenger. SignalSitter issues no signing secret for these endpoints and asks nobody for a credential. Each person connects their own messenger under Notifications (below). Anyone who hasn’t connected one isn’t reached.
- Go to Settings > Callback endpoints and enter an Endpoint alias.
- Under Where should incidents go?, choose one:
- A person, reached through WhooshBang. In Who to notify, leave it blank to notify yourself, or enter another member’s SignalSitter user identifier. They stop receiving alerts if they leave the organization.
- Everyone in this organization, reached through WhooshBang. Whoever belongs to the organization when an incident happens is notified.
- Leave WhooshBang notifier blank unless WhooshBang told you to use a particular notifier.
- Press Create endpoint.
Manage an endpoint
Section titled “Manage an endpoint”| Button | What it does |
|---|---|
| Send a test delivery | Sends a test and shows the response status. Changes nothing. |
| Change destination | Points the endpoint at a new URL. The signing secret stays the same. |
| Change WhooshBang destination | Changes Who to notify or the notifier on a person endpoint. |
| Change WhooshBang notifier | Changes the notifier on an Everyone in this organization endpoint. |
| Rotate secret | Issues a new secret, shown once. The old one keeps working for a short overlap. URL endpoints only. |
| Make organization default | Monitors that use the default deliver here. Clear organization default undoes it. |
| Switch off | Stops deliveries without deleting anything. Switch on starts them again. A switched-off endpoint can’t be the default. |
| Delete | Permanent. Monitors still pointed at it report it was deleted. |
Choose where a monitor’s alerts go
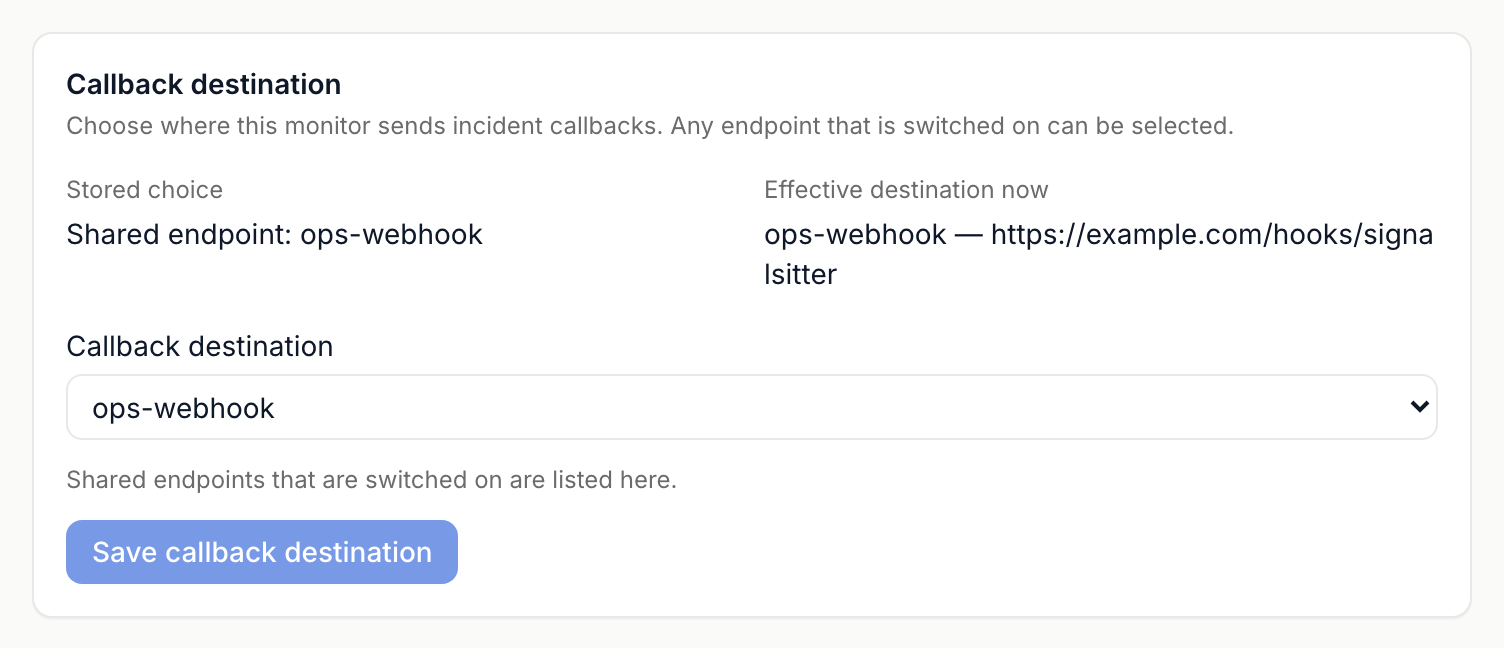
Section titled “Choose where a monitor’s alerts go”- Open the monitor and go to Settings.
- Under Callback destination, pick one:
- Use organization default
- a named endpoint (any endpoint that’s switched on)
- Do not send callbacks
- Press Save callback destination.
Effective destination now shows where alerts will go. You can also pick a Callback destination when you create the monitor.
Get your own alerts on your phone
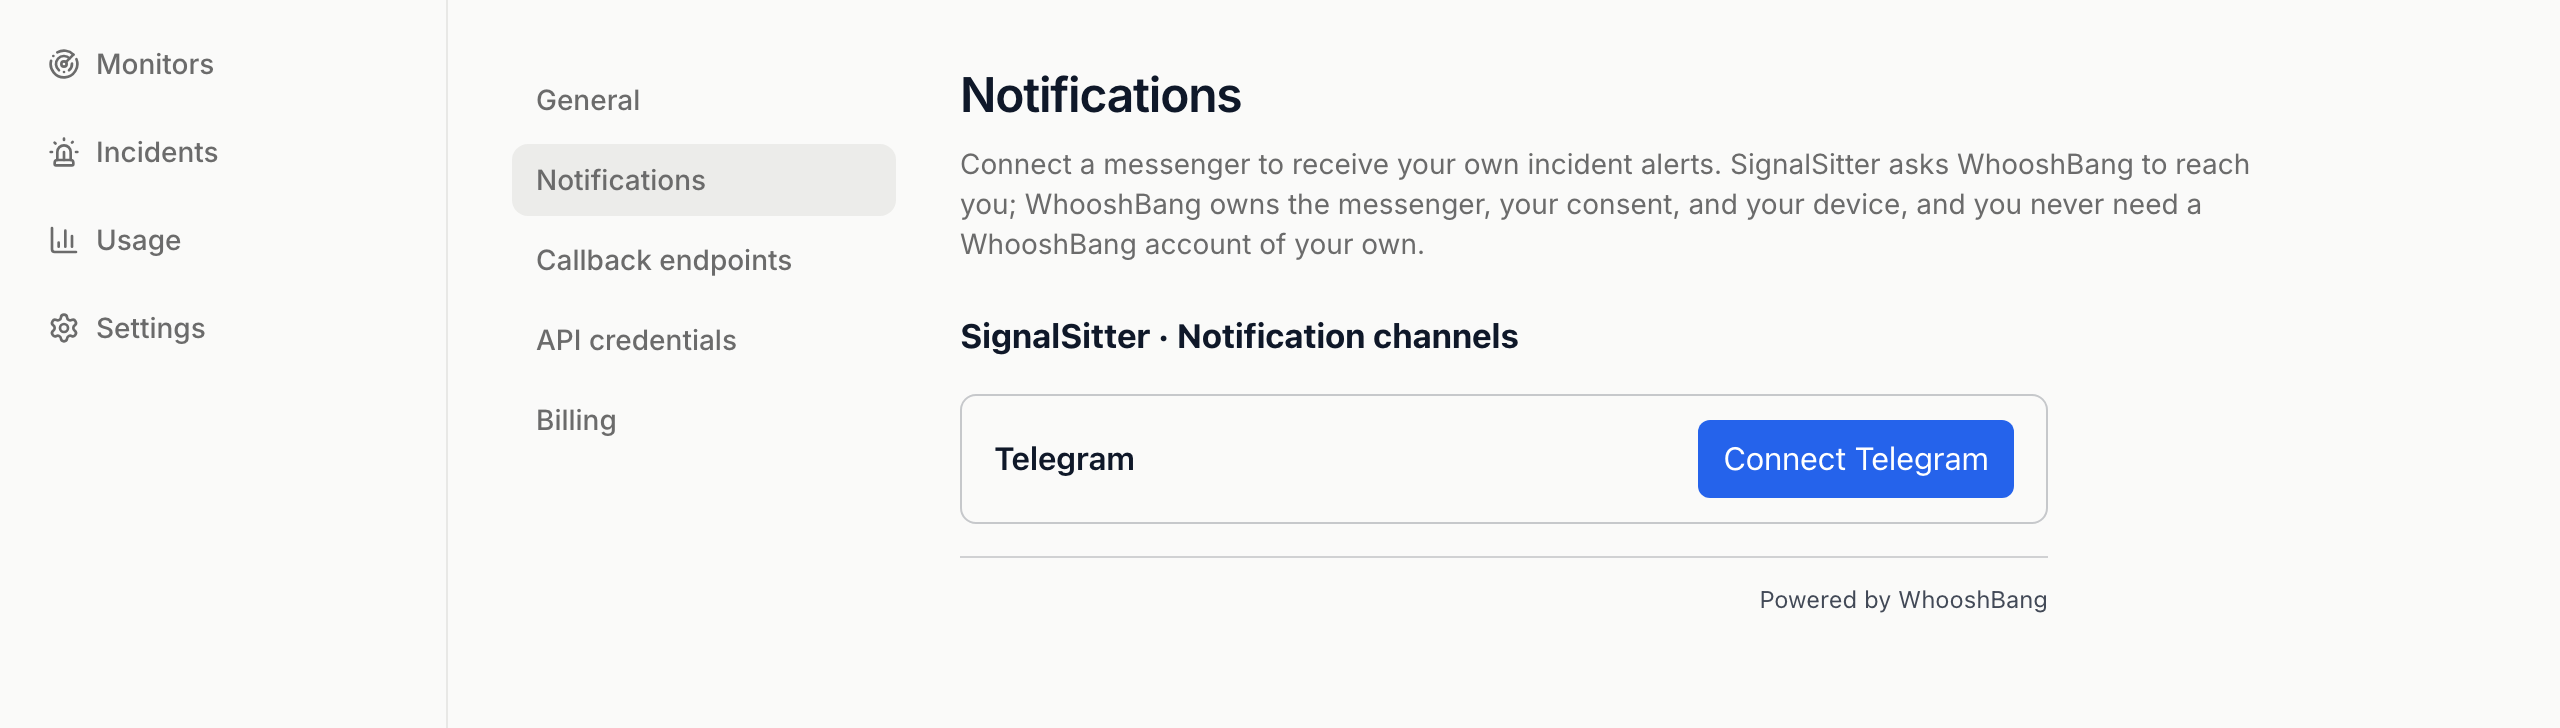
Section titled “Get your own alerts on your phone”Connect your own messenger so WhooshBang endpoints can reach you. You don’t need a WhooshBang account.
- Go to Settings > Notifications.
- Press the connect button for your messenger, such as Connect Telegram.
- Finish connecting in the window that opens.
If the settings stop working, press Open notification settings again. Nothing you’ve already connected changes.
- Incidents: see every delivery and request a redelivery.
 SignalSitter documentation